
Print, trim and join your poster.
Follow the sheets from the PDF to your wall, with a worked example and illustrated joins.
Use matching paper and orientation, print single-sided, and turn off Fit, Shrink and additional poster tiling.
1. Prepare your picture
Choose a clear JPG, PNG or WebP. Rotate or crop it in the Image step before setting the final size.
Original prints your image without a dot effect. Mono dots and Color dots change the look but do not restore missing detail. A test sheet helps you check small text, maps and fine detail before printing the full poster.
2. Set the paper and finished size
Paper size describes each sheet. Finished poster size is the outer size after assembly and trimming. It excludes printer margins and duplicate overlap, but includes any space left around the image by Keep whole image.
| Paper | Portrait dimensions |
|---|---|
| A4 | 210 × 297 mm |
| A3 | 297 × 420 mm |
| US Letter | 8.5 × 11 in |
| US Legal | 8.5 × 14 in |
- By sheets: choose how many sheets wide. Keep whole image preserves proportions and calculates the height. Fill & crop and Stretch to fill also let you choose Sheets high.
- By width: enter either finished dimension; the other follows the image proportions.
- Fixed size: enter both dimensions. Keep whole image may leave space around the picture; Fill & crop trims the edges; Stretch to fill changes proportions.
With Fill & crop, use Adjust crop position to choose what prints. Filling a layout does not remove the printer’s white margins.
3. Check margins and overlap
- Page margin: a blank border between the paper edge and the poster area. The default is 5 mm; your printer may need more. Zero margin only works with a suitable borderless printer and driver.
- Tile overlap: picture detail repeated on neighboring sheets to help line them up. The default is 5 mm.
- Cut guides and page labels: in this tool, cut guides print when enabled and the margin is at least 3 mm. Page labels print when enabled and the margin is at least 5 mm. Your printer may need a larger margin. Preview labels remain available when printed labels are off.
4. Print one sheet first
In Printed sheets, select a page and choose Download this sheet. This test PDF uses the same position, paper, scale and effect as the matching page in the full poster.
Open the PDF in a reader with explicit scaling controls, such as Adobe Acrobat Reader. Check these settings before printing:
- Paper size and orientation match the PDF.
- Scale is Actual Size / 100%; Fit, Shrink and automatic scaling are off.
- Two-sided printing and any additional poster tiling are off.
Check that small text is readable, colors look right, and the image edges and cut guides are not cut off. If they are clipped, increase the page margin, check the finished size and page count, and export again. Changing margins can change the finished size in By sheets mode.
Printer drivers can add scaling or borderless enlargement, so check their settings too. If the browser print dialog offers too little control, use a dedicated PDF reader.
5. Arrange the full set
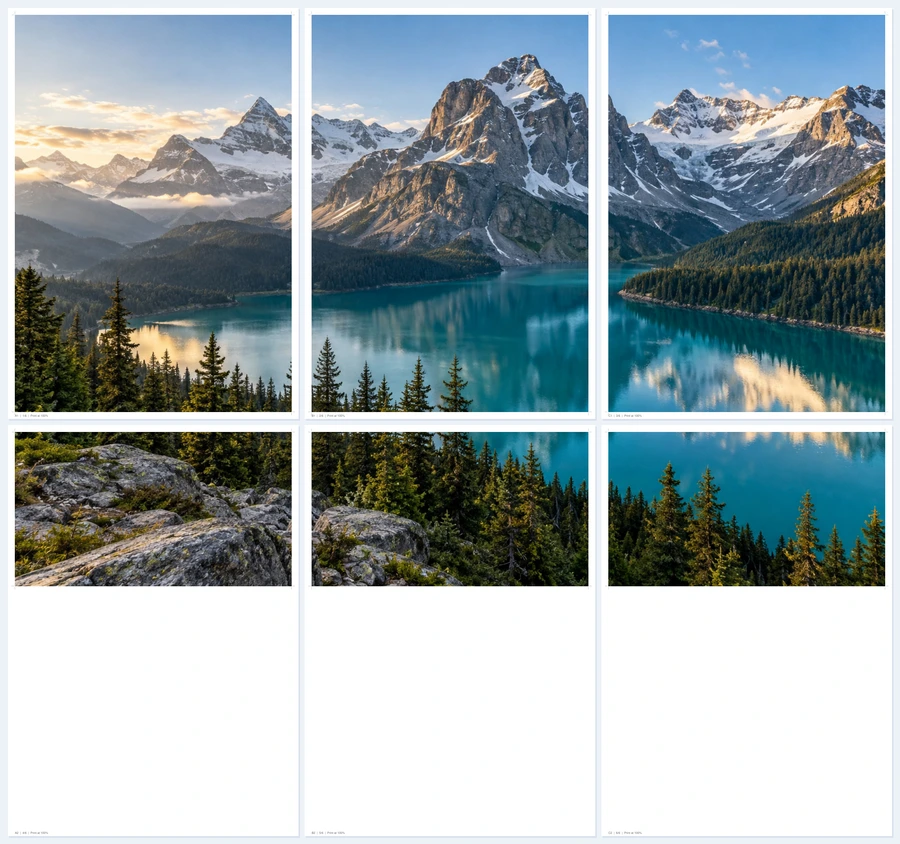
Download and print the full PDF with the same settings as the test. Lay sheets out across each row: A1, B1, C1, then A2, B2, C2. Letters identify columns and numbers identify rows. Keep labels visible until the order is checked.
A4 · Portrait · By sheets · 3 sheets wide · Keep whole image
5 mm margin · 5 mm overlap · Original
6. Trim and align the joins
For an overlap join, trim the adjoining white border from one sheet. Place its repeated picture strip over the matching detail on its neighbor. Match the picture detail rather than the outside paper edges; the repeated strip should appear only once in the finished image.
1. Mark the cut
On B1, cut along the red line at the picture’s left edge. Remove only the white margin.
2. Keep the overlap
The red strip is removed. Keep the blue picture strip intact; it is needed for alignment.
3. Match and join
Slide B1 left over A1 until the blue strips match. A1’s right white margin is underneath B1.
Repeat across the row, then join the rows in the same way. With zero overlap, trim the adjoining printer margins and place the edges next to each other.
On the final row or column, remove only paper outside the intended poster boundary. Use the cut guides, where enabled, and the dimensions shown in the tool. With Fixed size + Keep whole image, keep any space around the picture that is part of your chosen size. Cutting it away would make the poster smaller.
Tape the back where practical. Assemble a large poster a row at a time on a flat surface, then choose a mounting method suitable for the wall and paper weight.
Common print problems
The finished size is wrong
Check that the PDF reader and printer driver both use 100% scale. Measure the outer poster dimensions, including any space around the picture in Fixed size + Keep whole image. Count repeated overlap only once. If you changed margins in By sheets mode, check the updated size in the tool.
The joins do not line up
Check page order, matching paper and orientation, and identical scaling on every sheet. Align the repeated detail. Print from the original PDF rather than screenshots of individual pages.
The image looks soft
Use a higher-resolution source or a smaller finished size. The source, paper, printer and viewing distance all affect the result; a PPI estimate alone cannot guarantee sharpness.
The export does not finish
Try fewer pages, a smaller source image or wider dot spacing. The tool supports up to 100 pages, but available device memory still limits large projects. A desktop browser is usually better suited to them.
For Adobe’s explanation of scaling controls, see Adjust print scaling in Acrobat.